
Welcome to White Oak Farm!
Thanks for joining me for the fifth and final part in our series of tips for raising baby chicks! I hope you are excited and ready for your new animals! There’s nothing quite as rewarding as growing your own food, knowing where it came from and how it was raised! That’s such a big step toward your self-reliance.
ESSENTIAL TIPS
HOW TO TELL IF THE BROODER IS THE CORRECT TEMPERATURE
Baby chicks have the remarkable ability to find the ideal warm spot in the brooder so, once you understand their ways of communicating if you simply note your chicks’ positions, you’ll know whether the brooder temperature is too hot, too cool or just right.
Check out our WHAT WE USE page of this website for the link to a great digital thermometer and most of the other things you’ll need. You can refer to in CHAPTER 2 for the complete list of supplies AND the complete reference list of proper temperatures per week the brooder should be kept at. I printed out the list and hung it on the wall above the brooder!
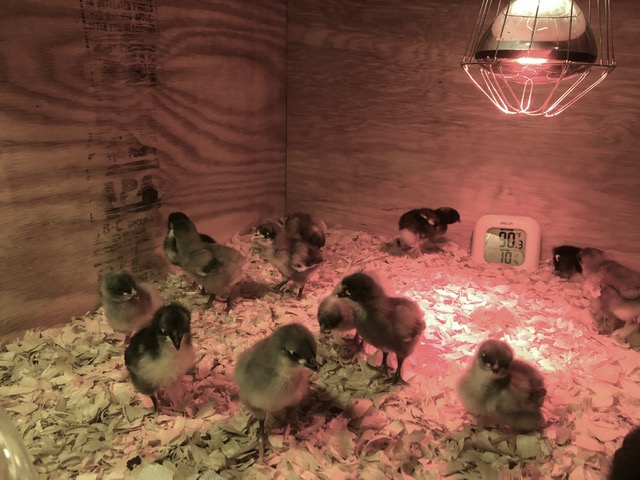
Correct Temperature
If the heat level is just right, chicks will be evenly spread throughout the brooder. With adequate food and fresh water, you’ll hear them making contented peeping sounds.
Temperature Too Warm
If your chicks are spread out around the perimeter of the brooder the temperature is probably too warm. Raise the heat lamp another couple of inches and/or switch to lower wattage bulbs. The chicks will be silent and you may notice them panting and hanging their heads down.
Temperature Too Cool
If the brooder is too cool, the chicks will huddle together directly under the heat lamp. They may be noisy which is a sign of distress. Lower the lamp closer to the floor of the brooder.
“OUTDOOR” TIME *
After the chicks are 2-3 weeks old, if it’s warm outside (65-70 degrees at least) and sunny, feel free to let them have a little “outdoor time”! Put them in a wire cage or erect some other temporary housing and place it in the sun, making sure they have access to water and shade if they need it. They’ll absolutely love digging around in the grass. But don’t leave them unattended! At this age they’re VERY good at flying and VERY susceptible to predators. Plus, if it’s windy they’ll get cold (and they’ll let you know they’re unhappy with their loud chirping).
By 4-5 weeks of age your chickens are ready to move outside full-time. And thank goodness! As much as you love them, you’ll be thrilled to get them out of your house. (Source: www.mypetchicken.com)

THE UMBILICAL CORD
Some baby chicks will arrive with their umbilical cord still attached. It looks like a very thin black string, attached to their rear. Please don’t pull it and just leave it alone! It can look like “pasting up”, but upon closer inspection you should be able to tell it is just below the hole where they poo from. It will fall off within a day or two and pulling it can really injure them.
HOW AND WHAT DO I FEED MY BABY DINOSAURS?
Haha Made you look! 😁 The only type of food you should ever feed your chicks in their first 14 weeks is a complete “chick starter and grower” crumble. Many brands are available in this type and some of your local farm stores may even offer their own organic chick crumble. Look for one with about 18% protein for laying chickens and 20-22% protein for meat chickens.
Many people swear they have success feeding chick feed straight from the bag. I have tried this too, but I prefer to grind my chicks’ feed for the first two weeks so they can eat it more easily. I find crumble pieces are a little too large for new chicks, especially for bantam size and silkie breeds.
Grinding a little helps them to absorb more of the nutrients so there is less waste. A food processor or “bullet” type blender works well for this, although I have even done it by hand with a ziploc baggy and hammer too! lol You want the pieces about half the size of the original but you DO NOT want a powder. That would be too small.
When they are 2 weeks old I begin mixing the ground feed with some full-size crumbles, a little more each day for week, until it’s all full-size. When they are about 14 weeks I start mixing in 16% protein “Layer Crumbles”. By 16 weeks they are completely on Layer crumbles.
VACCINES AND MEDICATED FEED OR NOT?
VACCINES
A decision you will be faced with is whether or not to get your chicks vaccinated for Marek’s Disease and/or Coccidosis from the hatchery or farm store. Many people say vaccines are not necessary under certain conditions especially if you want “organic chickens”, such as if no chickens are housed nearby or have ever been on your property, or if you don’t ever plan to get more chickens.
There is an excellent article at https://cluckin.net/is-vaccinating-chickens-necessary.html that will help you decide for yourself if you want to vaccinate some or not at all. I also recommend this article at https://eorganic.org/node/7839 which directly addresses organic chicken raising.
Haha….did anyone ever tell you about “Chicken Math”!? Chickens can live for 5-7 years or more, so there’s probably a good chance you’ll add another at some point. I recommend you do a little research on these 2 diseases and decide for yourself.
Personally, I want to protect them best I can from harm and that includes disease and getting sick or possibly dying. Heck, I get vaccines and our children and pets get them so, why would I want to take a chance with these animals. Of course it’s very debatable but, I have chosen to vaccinate/medicate for a couple of the most common, prevalent and dangerous diseases/problems which are Marek’s Disese and Coccidiosis and, you’ll have to make a choice for yourself too. Marek’s is usually offered by the breeder or hatchery for day old chicks and you probably will have to indicate it on your order.
MEDICATED CHICK FEED
The rule for medicated chick feed is if you opt for getting the Coccidiosis shots do not give medicated chick feed because it is counterproductive. That feed will cancel the effectiveness of the shot. However, the medicated feed seems to provide better protection from the disease. I opt to not get the shot and to feed only medicated feed till they are about 14 weeks which protects them during their most vulnerable age from Coccidiosis.
When they are about 14 weeks, I transition them to a 16% protein “layer crumble”. Within a couple short weeks, the medication is out of their system and won’t be transferred to their eggs. Once ours were fully-grown, they started liking both layer protein pellets and crumbles and eat some of each kind each day, but they don’t NEED both and choosing one is all that is necessary.
Offering snacks or treats to your chickens
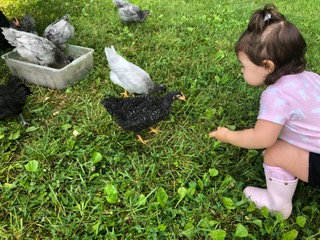
I tried layer “pellets” after a few weeks but my girls wouldn’t eat them. However, once they were about 6 months old we started giving treats to them such as sunflower seeds and then reintroduced the pellets as a treat and they loved them that way. They also can begin to get things from your garden or fridge as treats and my girls’ favorites are cherry tomatoes, cucumber or larger tomato slices, watermelon rind, etc. but only in moderation.
Always limit the amount of treats/snacks just as you would limit snacks and treats for your pets, children and yourself. If they are filling up on treats, they are not going to have space in their crop/body for their feed, so they’ll probably get diarrhea as well as miss out on the proper nutrients they need to stay healthy and produce healthy, quality eggs for you.

WHAT’S A CROP?
Many people say chicks only need starter food. However, chickens have an organ called a crop in their throat. Some people call it a gizzard. BUT chickens actually have a crop AND a gizzard! Chickens need to have tiny sharp pebbles like sand and tiny stones in the crop which will break down their food before it travels to the gizzard and then the stomach to be digested properly.
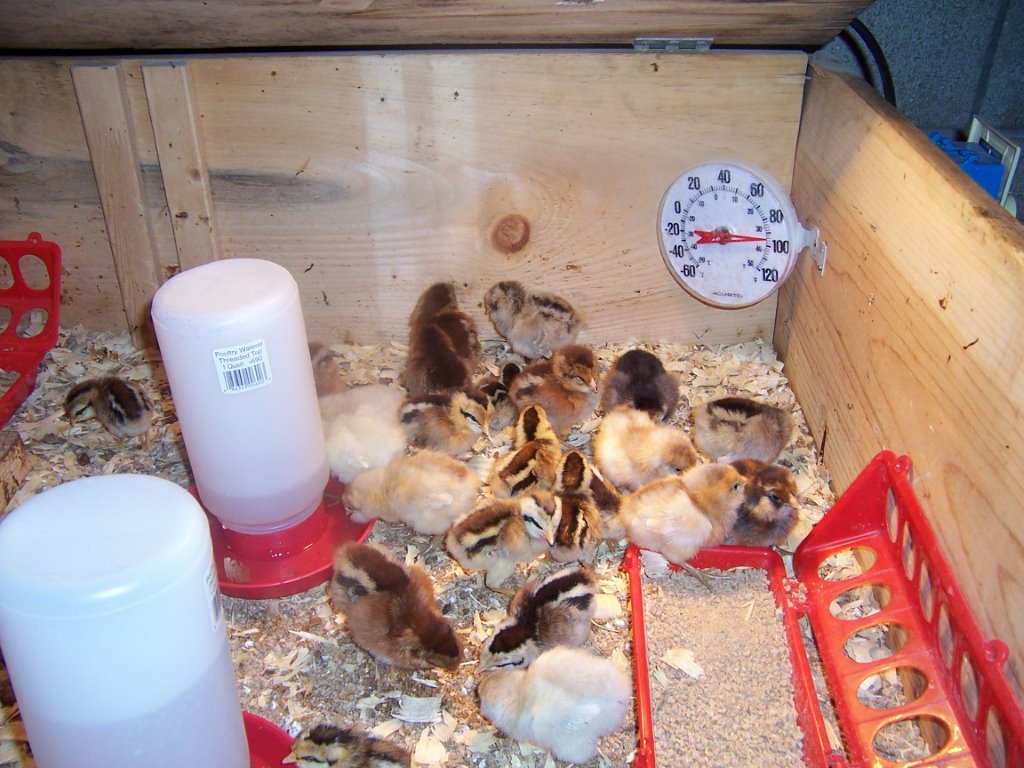
CHICK GRIT IS ESSENTIAL FROM DAY 1!
Commercially purchased chick grit is ground up bits of granite. It’s essential to help them break down the food crumbles or they can get what’s known as “sour crop”. This is when the food isn’t being broken down properly and, like the name suggests—it spoils in there and, makes them very ill.
Your chicks will attract tiny gnats or “fruit flies” no matter how clean you keep their brooder, and they will actually catch and eat those little flies! They’re very observant and surprisingly quick! Chickens are omnivorous, which means they eat meat and plant material, so this will not hurt them. These insects, as well as others that could make their way into the brooder without your knowledge, like ants or spiders, will get lodged in the crop and not be easily digested without chick grit.
Be sure to offer chick grit along side their food right from the start to keep your babies healthy! I like to keep it separate so they get just the amount they need. It can be mistaken for food if mixed into it, so I just sprinkle some on the concrete paver stone around the feed dish and they will take what they need.
WHEN DO CHICKS START FLYING?
They will suddenly figure out how to fly before you know it and you’ll want a cover such as chicken white or hardware cloth across the top. A window screen could also work well. Usually by 10-14 days they can fly about 18 to 24 inches high and they’ll be trying to perch on the edge of their brooder. You don’t want to find that out too late and be searching all around the house for your little fluff ball, so just get in the good habit of always covering the top EVERY time you leave them for even just a couple minutes.
GROWING… AND GROWING!
As your chicks get older you’ll understand why we recommended a minimum of 2 square feet of living space per bird. If you provided them less than that and your older chicks are picking at one another, do expand their living quarters. Both you and the chicks will be much less stressed. And as mentioned above, if they start flying on top of their brooder box, a simple length of deer netting or chicken wire laid on top of their living quarters should prevent it! (Source: www.mypetchicken.com)
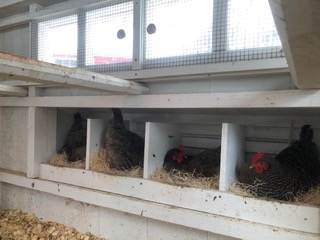
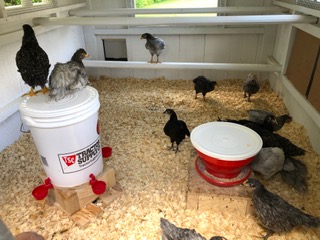
THE “BIG GIRL” COOP?
Once they are fully feathered, usually around 5 weeks old, your babies can graduate out of the brooder and are ready for the outdoor coop! That means you have a little time to get or build your coop but you really don’t have as much time as you think! In a few short weeks you’ll be very anxious to get those little girls out of the brooder and into a permanent home.
With some advance planning, you can time their feather development with availability of your finished coop, and your typical weather temperatures, so you won’t have to keep them inside any longer than necessary. Check out CHAPTER 2 for my chart on the correct temperatures per week of your chicks’ ages.
When deciding on which coop to get or build, keep in mind that if you’re purchasing a chicken coop it can take three or more weeks to arrive, and maybe even more with the current lumber and labor shortages we’re experiencing, so you may want to have that squared away long before you even get the chicks! I highly recommend visiting www.mypetchicken.com to learn about chicken coop size and roost requirements, how to transition them to their coop, and how to care for them as they get older. If you have questions, please leave them in the comments below.
TIPS FOR INTRODUCING THEM INTO THE COOP
If you keep them inside the coop for the first 2-3 days straight, without letting them outside at all, it’s just like a big brooder to them. This gets them used to perching on roost bars at night and teaches them where their home is. Do this and you should never have trouble with chickens not going into the coop at night or roosting where they aren’t supposed to.
Also, be sure to cover up the nest boxes when they’re too young to lay eggs. This is so they can’t sleep in them and don’t start the bad habit of learning to roost in them. Chickens poop all night long and this would be a very bad habit they will get into if allowed when young.
Chickens can be lazy or decide to roost in the nest boxes for other reasons as well, but you don’t want poopy eggs daily! lol Later on when they’re full-grown, sleeping in a nest box should be unusual for them and can be a sign of illness, injury or even being bullied by the others.
TOYS, TREATS AND PERCHES
It’s best to NOT give any treats, scraps, toys or perches to your baby chicks for a few reasons. Treats can upset their new little system and give them diarrhea which will quickly dehydrate them.
They are ruthless little peckers they will try to eat anything and everything in their path! Cardboard, paper, glitter, fur, etc. Pieces of plastic, string or thread can actually strangle them on the inside of their body.
Their legs are not developed enough for even low perches till about 3-4 weeks of age so they can become injured by hopping on and off things.
It’s best to do without these extras unless it is something made especially for chickens and of very sturdy materials such as a small piece of log. Some infant toys could be suitable as well.
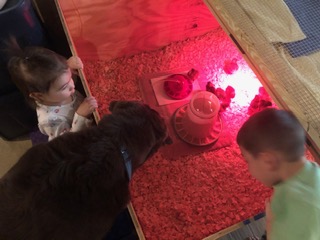
DEALING WITH KIDS AND CHICKS
If you’ve got kids or you’re planning on bringing kids over to see the chicks, set the boundaries up front. Chicks are irresistibly sweet and cheeky kids tend to harass them. Make sure you watch the chicks; if they show signs of distress, be firm and return them to their brooder. Also, if you have chicks that are or were recently pasted up, please instruct your kids to let them be. Over-handling can prevent a chick that’s “on the edge” from bouncing back (it can be the death of them!). (Source: www.mypetchicken.com)
HAVE FUN!
Preparation is the key to success!
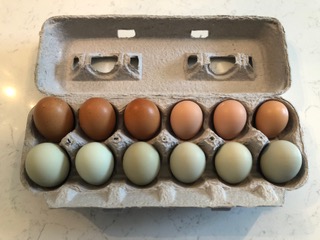
Once everything is in place, you can rest easy and enjoy your sweet new chicks! They are adorable and fluffy but will grow very quickly! Before you know it, they’ll get hard feathers and become gawky looking teenagers within just a very few weeks. With these tips and your good care, they will grow and thrive. Soon they will be providing your family with delicious, fresh eggs!
Thank you for reading The Ultimate Guide to Baby Chicks! I hope it has helped you decide to make space for these sweet little creatures in your world and has answered many of the questions you may have had about them!
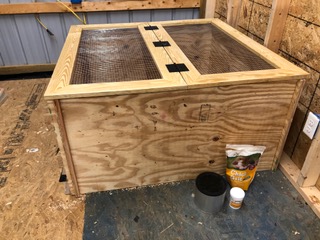
Visit the VIDEO GALLERY page of this website to see How to Build a Chick Brooder Box. In this video, Martin takes you into his workshop to show you how to build it out of 1 sheet of plywood. It’s a really nice, sturdy one that stores flat. It can be used for many years to come for raising chicks and even as an isolation box for a hurt or sick chicken in the future.
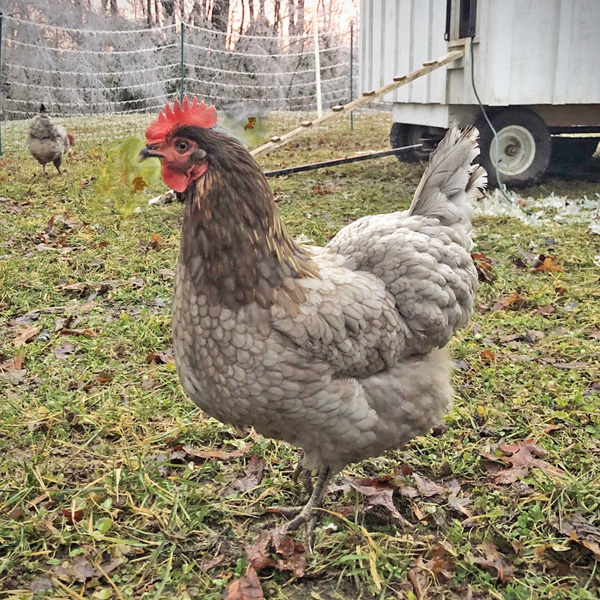
You can see my sweet Daisy in the brooder box during her recovery below. She is a Sapphire Gem. She’s a survivor of a recent hawk attack the day after New year’s Day. Fortunately she survived but was in shock for 2 days. The poor little girl lost some sight in her left eye and about 1/2 her body weight. She has had a rough go of it.
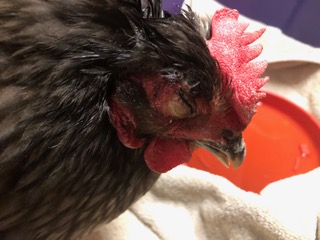
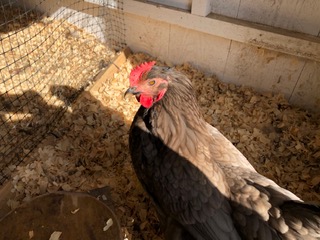
It took her a month for her injuries to heal up before we could introduce her back into the flock. That was a long, difficult process. She has never regained her place in the pecking order she had before her injuries and some of the dominant hens unfortunately still pick on her and chase her around. I had to partition off a small part of the coop for her so the others could get used to her again. I included a nest box and part of a roost bar in her section so she could be right up beside them on the roost.
She is very attached to me since being nursed back to health and receiving extra brushing, treats and cuddle time.
GET ALL THE INFO YOU NEED!
Be sure to check out the other Chapters in this FREE E-BOOK series for all the must-know tips! You can find the links at the bottom of this blog page and also on the FARMHOUSE BLOG page of this website.
There’s a complete list of the supplies you’ll need for your chicks in CHAPTER 2 of this series, and lots of those items are available through the links on our WHAT WE USE page.
I wish you much success raising your new chicks! I hope you’ll come back again soon for more farm animal stories and chicken raising tips.
Truly,

“Don’t wait around for other people to be happy for you. Any happiness you get you’ve got to make yourself.” – Alice Walker


Keep up with us on the farm right here at our SMH website and please check out our videos from our SMH YouTube Channel too! There are currently chicken related videos on Building a really nice, sturdy Brooder and Winter Feeding of our Chickens.
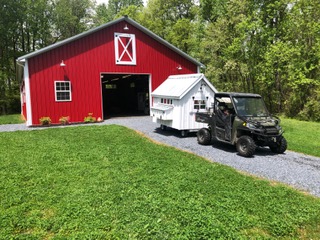
You can also find our YouTube videos on this website on the VIDEO GALLERY page. We’ll release a couple more YouTube videos soon of our Mobile Chicken Coop and our Premier 1 solar/electric fencing system for pasture-raised chickens! I also like to post current pics of my girls, what they’ve been up to, and I’ve been introducing them by name on our SMH Facebook Page!
Leave a Reply